|
<< Click to Display Table of Contents >> Server and client installation > Windows server |
How to install Virola server on Windows server
How to install Virola server on Windows server
1.First of all you need to download and install Virola for Windows server
2.Create a directory for Virola data storage.
3.Launch terminal with "cmd" command typed in a command prompt: press Windows +R keys combination and type cmd in the search field
4.With help of cd command navigate to the directory where Virola server was installed
5.Run Virola server:
virola-server --listen 127.0.0.1:7777 --storage-dir C:\Folder Name\Virola
where C:\Folder Name\Virola - the path to the directory you created on the Step 2,
127.0.0.1 - IP of the chosen for Virola server.
7777 - port number
6.Leave command prompt open
7.By default login details to Virola Client will be admin / admin. You can change them in the Virola client settings

Example of running Virola server
IP address and port
If you can use 127.0.0.1 IP address for Virola server, Virola client can be connected only from the same machine where Virola server is installed. This IP address is provided as an example.
If you would like Virola to be accessible from the computers within one network, you should use private IP address assigned to the server where Virola is installed by the router. These IPs have the following look 192.168.Х.Х, 172.16.X.X, 10.0.X.X, 100.64.X.X. You can check such IP for your machine in Windows Settings / Network and Internet / Status Properties / IPv4 address
To make Virola server accessible not only within your local network but also from the Internet, you should have public IP address which is provided by your Internet service provider or VPN service. Additionally, you should set Port Forwarding on your router. Instructions will depend on the router version.
GUI for Windows server
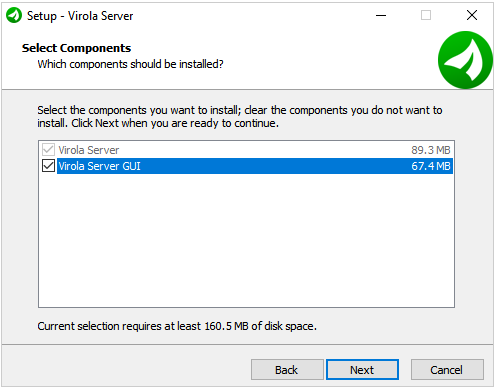
To make the process of using Virola server more intuitive for Windows server users, we designed special GUI which can be installed together with Virola for Windows server. While installing Virola server for Windows you need to keep "Virola Server GUI" option active:

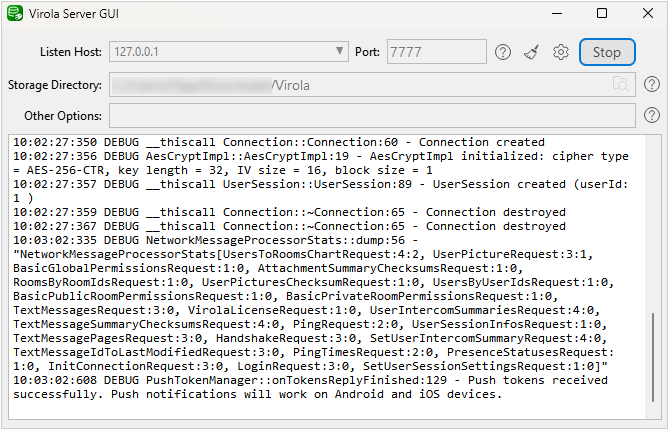
After installing Virola server GUI, you can launch the app from the shortcut, start menu or pin it to your Taskbar and start directly from it:
To start Virola server you need to:
1.Enter host to the "Listen Host" field.
2.Enter port number to the "Port" field
3.Enter the path to the folder, where the database will be stored. Note!: this folder should be writable
4.Press "Start" button
After this the server will run and will be hidden to the system tray if you press "x" button.
When the server is running, you can check its log in the GUI window. The log is kept in case of the server crash. This can help to troubleshoot issues.
To stop Virola server you need to press "Stop" button.

Virola server for Windows GUI
If you need to quit Virola server GUI after stopping the server you need to right click on the system tray icon for Virola server GUI and select "Quit" option:

Virola server GUI settings
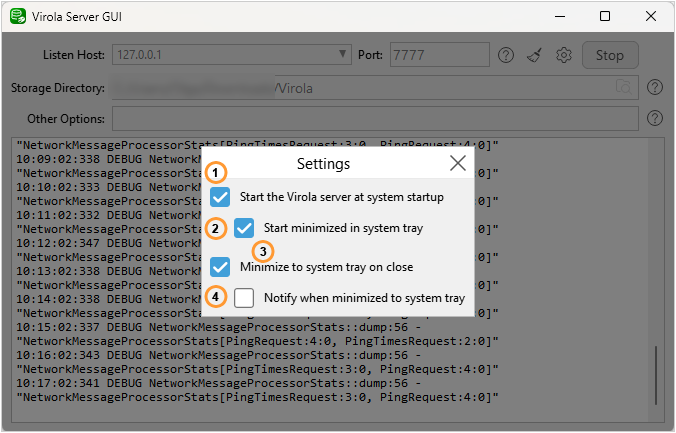
In the settings menu you can configure the following Virola server options:

Virola server for Windows settings
1.Start Virola server at system startup
2.Start minimized in system tray
3.Minimize to system tray on close
4.Notify when minimized to system tray