|
<< Click to Display Table of Contents >> Admin configuration > User self-registration > User self-registration |
Self-registration
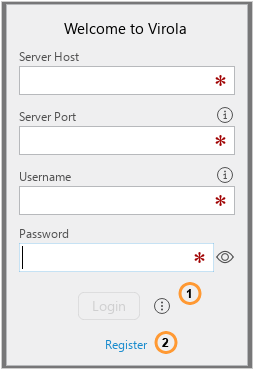
To self-register a user needs to do the following after starting the Virola client:
1.Expand the form at the bottom
2.Click "Register" link

Self-registration
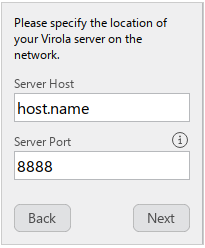
3.Enter host name and port and click "Next" button. These identifiers are unique and should be provided by Virola admin for self-registration.

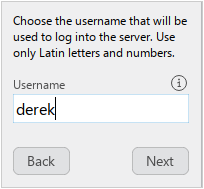
4.Enter the user name and click "Next" button. Please note that you user name should be unique.

5.Enter the password for your user and click "Next" button

6.Click "Login to the Server" button to log in with the entered user credentials.
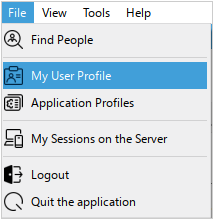
7.After logging in as a user, you can update your user profile and upload your picture by following File / My User Profile in the top menu or select My User Profile option from burgher menu.

Self-registration link
It is also possible to provide your new users a link for self-registration. It contains host and port and creates a new profile in Virola client app for self registration. The link has the following look:
virola://command?action=self-registration&host=127.0.0.1&port=7777
where
127.0.0.1 is host IP or host name
7777 is port number
After opening this link in a browser the Virola client app will raise and open a new self-registration user profile where a user will need to:
1.Create user name
2.Create password
3.Login to the server